
For me, besides researching original articles, testing VPS, and expanding website traffic, the most important task is WordPress backup.
Thinking back to a long time ago, when I was using virtual hosting to build websites, I never did any backups at all.
There were two main reasons for this:
First, at that time, using WordPress to build websites was just a simple hobby, and I didn’t fully understand the importance of blogs.
Second, due to a lack of knowledge, the concept of backup never crossed my mind.
Until one day, tragedy struck…
I don’t know if you, who are reading this article, are also unable to tolerate the WordPress update prompts in the admin panel. Every time you see plugin updates, you can’t help but upgrade.
Generally speaking, for system security, it is recommended and sometimes necessary to upgrade plugins and themes to the latest versions.
However, an important issue is often overlooked during upgrades, which is compatibility.
This includes two aspects: the compatibility between plugins and the host system, and the compatibility between plugins themselves.
For example, if an old version of a plugin is written in PHP 5.X and the new version is written in PHP 7.X, upgrading may cause compatibility issues if your host system is using PHP 5.X.
Alternatively, conflicts may arise between a plugin that has been upgraded and one or several other plugins, which can also lead to incompatibility.
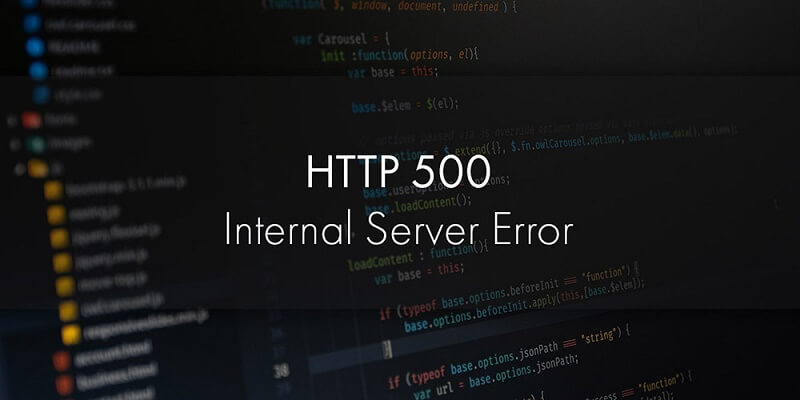
The consequence of incompatibility is that the website cannot be accessed! (500 Internal Server Error)
Sound familiar?
So, that day, after logging into the WordPress admin panel, the website suddenly showed a 500 error after I upgraded several plugins.
At that time, my knowledge of website building was very limited, so I had to seek help from the virtual hosting provider.
Numerous support tickets were exchanged, consuming almost a whole day. Finally, the hosting provider agreed to provide a time-limited download of their own backup of the website data.
However, this data was from over a dozen days ago because they only provided a WordPress full site backup once every half month.
Fortunately, my blog wasn’t frequently updated, and the subsequent website recovery went smoothly, so the amount of lost data wasn’t significant. However, it still left me feeling very unpleasant, and even now, I still feel a bit of lingering fear when I think about it.
(In hindsight, it wasn’t that complicated. I just needed to rename the plugin directories one by one and enable them again, then identify the problematic plugin and disable it.)
From this incident, I learned two lessons:
- WordPress site data must be backed up regularly.
- Don’t rush to upgrade plugins; it’s best to wait for a period of time (like half a month) before upgrading, and make sure to perform a full site backup and SnapShot backup (if supported by your VPS) before upgrading.
So, since then, I have been backing up all of my websites at least twice a week.
Initially, I did it manually by compressing the entire site data and exporting the database, saving them on the server and downloading them to my computer.
Later, as I became more proficient in Linux commands, I discovered that many manual operations during the WordPress backup process could be fully automated through simple programming, greatly improving the backup efficiency.
Currently, I use a WordPress backup script (see details below) that automatically backs up once a day and uploads the backups to remote VPS/FTP space. Both the local VPS and remote VPS retain the backups from the most recent N times.
In addition, by utilizing the SnapShot backup feature provided by Hostwinds, I can also back up the entire VPS system at any time, further ensuring the security of website data.
Local VPS + Remote VPS + SnapShot backup create a triple backup storage, so there’s no need to worry about data loss anymore.
Of course, this is entirely due to using VPS and managing everything through command line, which allows me to learn and practice these Linux skills.
On the other hand, the website building approach that relies on visual panels (such as cPanel or DirectAdmin) hardly provides an opportunity to learn and practice such Linux knowledge.
Next, this article will share two WordPress backup methods that I personally use: the manual backup commands I used before and the automatic backup script I am currently using.
It will also cover WordPress restoration and recovery, as well as WordPress migration and relocation operations.
#1 Manual Backup Command
Backing up WordPress manually on a Linux system is not difficult.
It involves two main parts: backing up the website source files and the corresponding database.
① Wordpress Source Files Backup
To facilitate management, let’s first create a folder to store the backup data, such as /home/backup/:
You can use PuTTY to connect to your server and enter the following command in the terminal:
mkdir /home/backupAlternatively, you can use WinSCP to directly create a backup folder in the home directory of the VPS.
Taking this website freeforwptheme.com as an example, compress the website’s root directory and move it to the /home/backup/ folder (for easy management, I added the backup date, and I recommend you do the same):
My website is located in the /home/wwwroot/freeforwptheme.com, so I need to backup the freeforwptheme.com directory.
For you, this directory may be /home/wwwroot/XXX.com or /home/www/XXX.com.
In any case, you need to first find the directory where your website is located and then perform the following operations.
cd /home/wwwroot

tar -zcvf vultrt-2023-11-28.tar.gz freeforwptheme.com

mv vultrt-2023-11-28.tar.gz /home/backup/
Alright, the entire website has been backed up. Next, let’s proceed with backing up the website database.
② Website Database Backup
Use PuTTY to enter the MySQL installation directory /usr/local/mysql/bin/ (this is my MySQL installation directory, you need to find your own directory first, do not blindly copy my directory path), and run the following command in SSH to save the backup database file ‘backup.sql’ in the /home/backup directory.
mysqldump -uroot -p --events --ignore-table=mysql.events --all-databases > /home/backup/backup.sqlEnter the root database password to complete the database backup.
After switching to the /home/backup/ directory (command: cd /home/backup), use the command # ls -la to view the current directory.
You should be able to see the compressed packages that have been backed up.
At this point, you can download them to your local computer using an FTP tool or upload them to another VPS/FTP for storage.
#2 Automatic Backup Script
If you only need to backup occasionally, the manual backup method mentioned above is not so inconvenient.
However, if you need to backup frequently, such as once a day, manual backup becomes too inefficient.
Imagine that you need to log in to the VPS at least once a day, run a series of commands, and then upload them to another VPS or FTP space.
Moreover, if you want to download them to your local computer, it will take some time to transfer the compressed packages, which can be several hundred megabytes or even several gigabytes.
In fact, after manually backing up a few times, I have become tired of this monotonous and inefficient backup method.
So, I wrote a relatively simple and practical WordPress automatic backup script.
Its main features include the following:
- ① Automatically back up all WordPress root directories (website data) and all databases on the current VPS;
- ② Backup the entire database directory, as well as website-related directories such as SSL certificates;
- ③ Support automatic FTP upload to another VPS or FTP space;
- ④ Support customizable backup frequency and retention of the latest N backups;
- ⑤ Support automatic restoration (from the local VPS or remote FTP) and migration/relocation.
First, install the backup script:
cd /home/wwwroot/ && wget https://freeforwptheme.com/wp-content/uploads/2023/wp-backup-vultrt.shThen, modify the relevant information (refer to the instructions in the article for details):
vi /home/wwwroot/wp-backup-vultrt.shFinally, set up scheduled backups (e.g., every two days or every other day at 00:20):
echo -e "20 0 */5 * * bash /home/wwwroot/wp-backup-vultrt.sh" >> /var/spool/cron/rootOf course, you can also customize the backup frequency, such as every day or every three days, by changing */5 in the above command to */1 or */3. However, it is recommended not to have too long intervals and to backup once a day or every two days is better.
Now, you can check the scheduled backup task that has been successfully added:
crontab -lNow, you can try manually backing up once:
bash /home/wwwroot/wp-backup-vultrt.shCheck the backup directory, and you will see a new backup:
ls -la /home/backup/There are several variables that need to be set (related to remote FTP, backup names, backup retention count, etc.) in the backup script.
You can modify them according to your specific requirements. It is recommended to review the script and understand its functionality before making any modifications.
If there is no remote FTP, the related settings can be left blank, and the backup will only be saved on the local VPS.
FTP_IP=111.111.111.111 (Remote FTP address)
FTP_USER="ftpusername" (Remote FTP username)
FTP_PASSWD="ftpuserpasswd" (Remote FTP password)
BACKUP_NAME="vultrt-wp-backup" (Backup name, it is recommended to only change "vultrt")
BACKUP_NUMBER=3 (Number of backup copies to keep)
MYSQL_ROOT_PASSWD="mysqlrootpasswd" (ROOT database password)
FTP_BACKUP="/home/backup" (Remote FTP backup directory, default is fine)
DIR_BACKUP="/home/backup" (Local VPS backup directory, default is fine)
#3, Script Usage
In addition to setting the relevant variables mentioned above, the script also requires the following configurations before use.
It mainly involves configurations on the local VPS and the remote VPS/FTP space.
① Configuration on the local VPS
First, you need to install the ftp command, otherwise, you may get the error “-bash: ftp: command not found”:
yum install ftp -yThen, create a backup directory /home/backup/:
mkdir /home/backupIf you have already created this backup directory in advance, you can skip this step.
② Configuration on Remote VPS/FTP
Here we demonstrate the operation of creating an FTP user on the remote VPS. If you already have an FTP account, you can skip this step.
First, create the backup directory /home/backup/:
mkdir /home/backupNext, install the ftp command:
yum install ftp -yThen,check this post to install ftp server on your VPS.(How to install an Debian FTP Server)
Finally, to avoid the “553 Can’t open that file: Permission denied” error when using FTP tools for uploading, it is recommended to change the permissions:
chown www:www -R /home/backupWith this, all the preparations for FTP backup are completed.
#4, Conclusion
This WordPress automatic backup script was developed and tested in a Debian 11 + LNMP environment, so I only recommend using it in this environment.
However, considering my limited expertise, there may be bugs in this backup script. If you encounter any issues during usage or have any suggestions, please leave a comment below for discussion.