Preface
I don’t know if you have encountered such a situation: when purchasing a VPS, the disk is too small due to budget issues; or you need to add a more secure storage space on the VPS for file backup; or you simply want to play with object storage. This article is very suitable for you!
Specific approach
In fact, a very common operation is to mount an S3 bucket locally. However, this time, we will use the tool s3fs (https://github.com/s3fs-fuse/s3fs-fuse), which can mount S3 buckets into Linux, macOS, and other systems using FUSE!
So, I thought of finding a free S3 service and then mounting it on our VPS. This way, it can be used as both an expanded storage for the VPS and a secure backup space, killing two birds with one stone.
In theory, this method can be used to mount any S3 bucket onto a VPS or local machine!
Tools Required

For this tutorial, I am using a VPS with Debian 10 and a free 75GB object storage provided by Scaleway (https://console.scaleway.com/register).
Scaleway’s parent company is Online, founded in early 2002, with three data centers in Europe (Paris, Amsterdam, Warsaw). Its distinctive service is the ability to create remote hosts with Apple M1 chips for €0.11/hour.
Scaleway claims that their object storage servers are located in underground bunkers 25 meters below ground, so I feel: very secure!
Therefore, I chose Scaleway for this tutorial!
Registering with Scaleway requires a credit card that supports Euro payments. If you don’t have a credit card, you can consider Oracle’s free 20GB S3, AWS’s free 5GB S3, and so on.
Steps
1.Create a storage bucket on Scaleway.
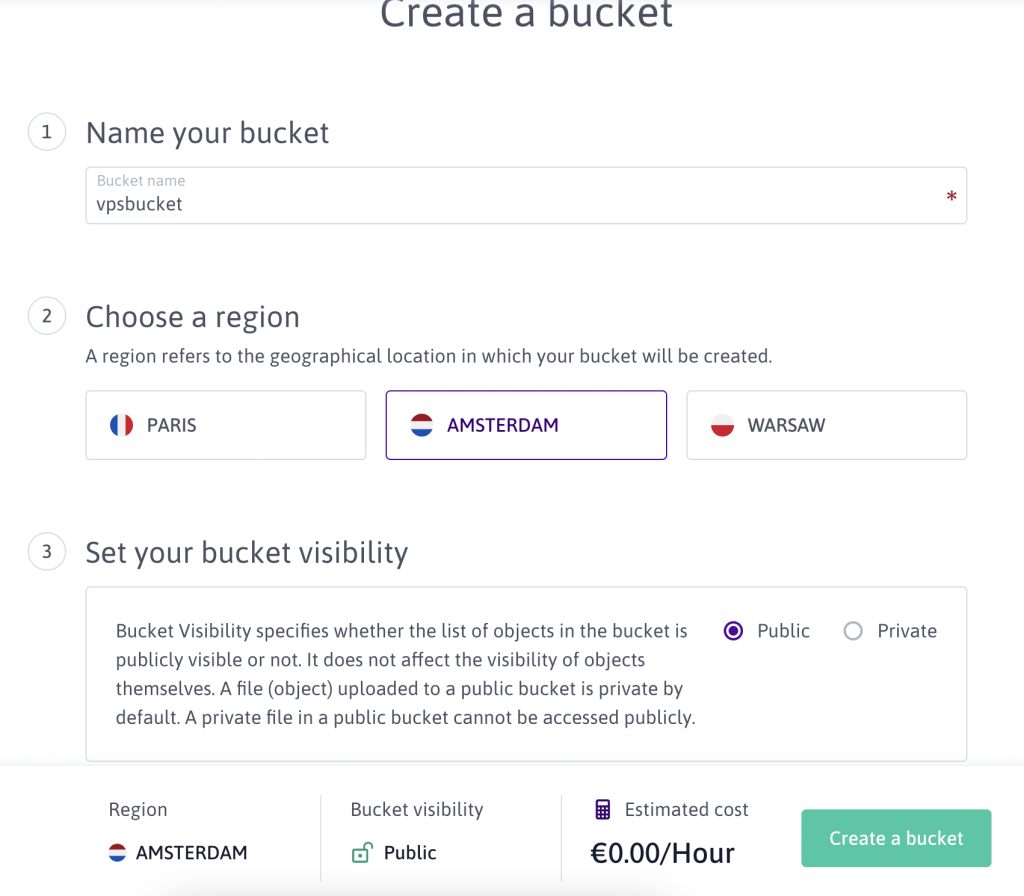
Note: Remember the bucket name; do not choose Paris as the region; choose public visibility!
2.Create an API key on Scaleway.
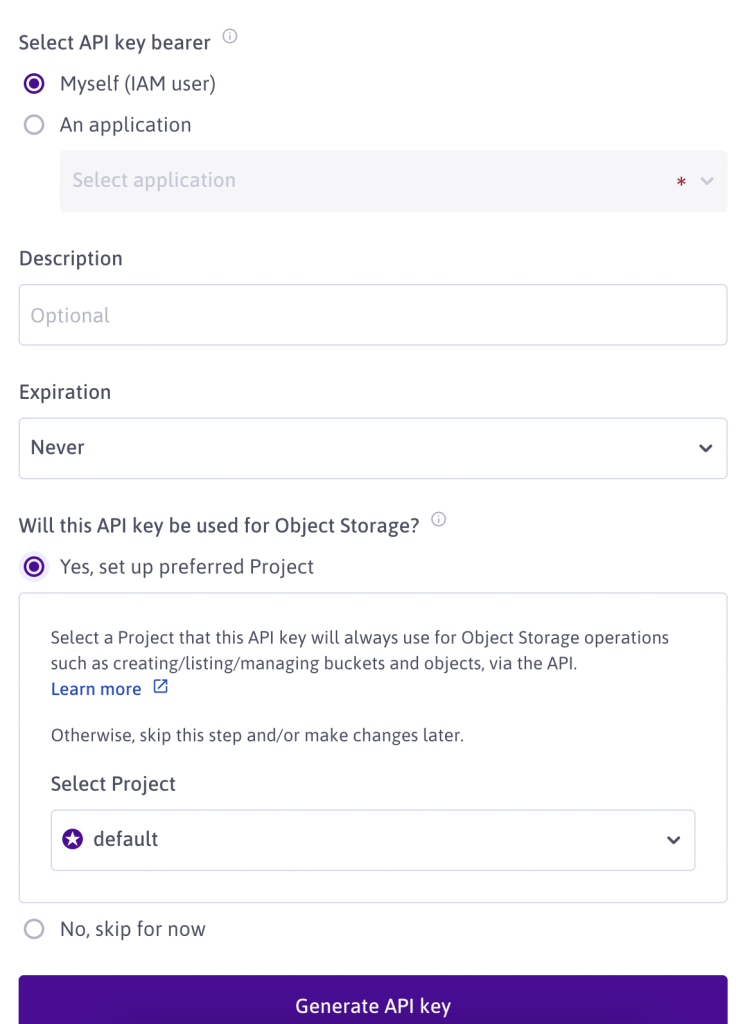
Note: When creating the API key, the owner should be IAM, set the expiration time to never expire, and select “Yes” for use with object storage.
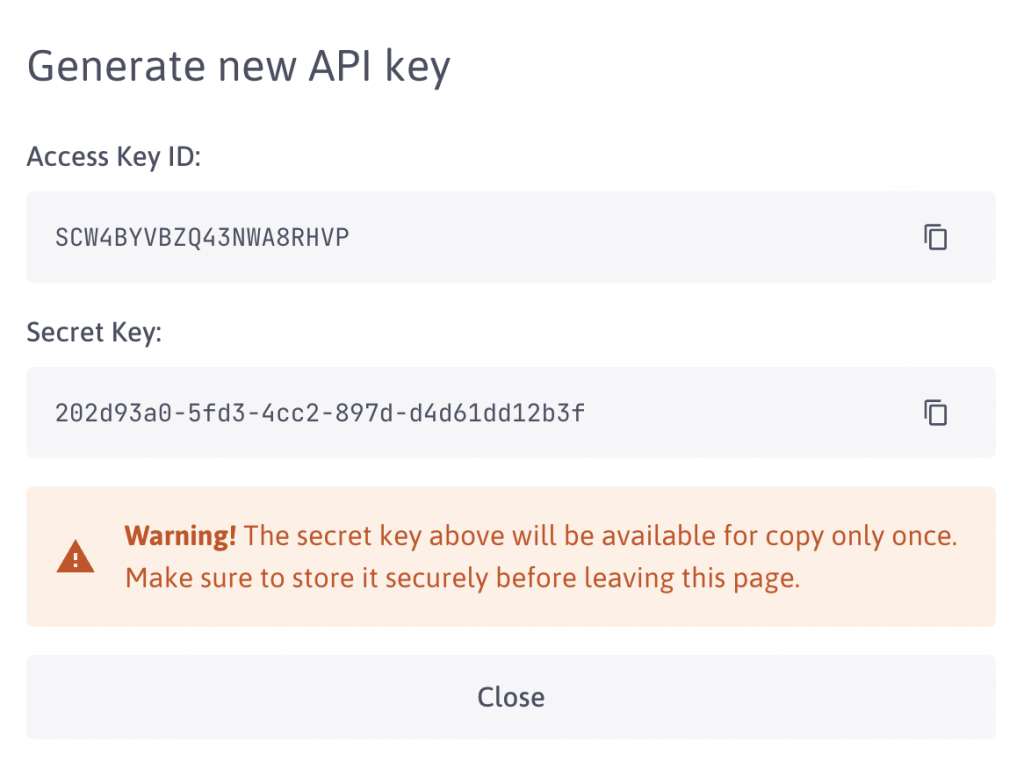
After clicking “Generate Key”, make sure to copy and save the Access Key and Secret Key. They are shown only once!
3.Perform the following operations on the VPS
apt update && apt install -y s3fs
echo "user_allow_other" >>/etc/fuse.conf
mkdir -p /oss
echo ACCESS_KEY:SECRET_KEY > ~/.passwd-s3fs
chmod 600 ~/.passwd-s3fs
Modify ACCESS_KEY and SECRET_KEY to your own!
s3fs BUCKET_ID /oss -o allow_other -o passwd_file=~/.passwd-s3fs -o use_path_request_style -o endpoint=BUCKET_REGION -o parallel_count=15 -o multipart_size=128 -o nocopyapi -o url=https://s3.BUCKET_REGION.scw.cloud
Modify BUCKET_ID to the bucket name, and modify BUCKET_REGION in two places to your own region!
In the Bucket Endpoint, we can locate the region of the bucket. Amsterdam is nl-ams, and Warsaw is pl-waw.
Next, check if the VPS has already mounted the bucket.
Here it will show 256T of space, but don’t get too excited. We can only use 75GB, and anything beyond that will be charged at €0.01/GB/month!
4.Completed the mounting
You can now test the speed of the disk!
It should be noted that after testing with dd, the mounted bucket will have significant speed bottlenecks due to different block sizes, with a minimum of 13M/s and a maximum of 39M/s.
It cannot read and write like a local device and is limited by network speed and latency.
So, if you want to store website files in the bucket, the speed will be slightly slower.
For example, using a VPS in the US and an object storage in Europe, you have to go through half the globe.
If you use the bucket as a backup disk, it works very well. You can also set up scheduled backups, and since the bucket is separate from the VPS, even if the VPS is damaged, it doesn’t matter.
We can remotely download files from your bucket. I think this is the highlight of this tutorial.
5.set up automatic startup
apt install -y supervisor
systemctl enable supervisor
vi /etc/supervisor/conf.d/s3fs.conf
Then add the following code:
[program:s3fs]
command=/bin/bash -c "s3fs vps-mount-amsterdam /oss -o allow_other -o passwd_file=~/.passwd-s3fs -o use_path_request_style -o endpoint=Bnl-ams -o parallel_count=15 -o multipart_size=128 -o nocopyapi -o url=https://s3.nl-ams.scw.cloud"
directory=/
autorestart=true
stderr_logfile=/supervisor-err.log
stdout_logfile=/supervisor-out.log
user=root
stopsignal=INT
Note: The content inside the double quotes is the same as the manual mount! Then you can restart to see the effect!
Where are the files?
After mounting S3 to the VPS, you can use FTP or SFTP to upload and download files.
Considering the security of object storage, we have to sacrifice some speed. It is not recommended to use this method for live streaming, as there may be buffering when streaming video files from the bucket.
Finally, all the files we backed up can be viewed and downloaded in the Scaleway object storage backend.
Advanced Usage
What I can think of now is to automatically backup website files and databases. The specific implementation method is as follows:
1.Write the following backup.sh:
user=database user name
key=database password
dbname=database name
date=$(date +%Y%m%d);
bak=${dbname}_${date};
mysqldump -u$user --password="${key}" ${dbname} > /root/${bak}.sql
tar czvf /root/${bak}.zip /www/wwwroot/your website dir
mv *.sql *.zip /oss
2.Run chmod in shell:
chmod u+x backup.sh3.Add a cron job:
crontab -eAdd:
35 09 * * * /root/backup.shSave, and then view the task.
crontab -l
If everything is fine, the server will automatically package the website files and databases at 09:35 AM every day and send the backup files to /oss, which is the mounted object storage.
Now your website is secure, right?