
In PalWorld, you can choose to enjoy a leisurely life with the magical creatures called “Pals,” or engage in adventures fighting against poachers. Pals can battle, breed, assist with farming, and work in factories. You can also sell them or consume them after disassembling them.
Pals, the magical creatures in the game, is often referred to by players as a “stitched monster” game. It successfully combines elements from Pokémon and Ark: Survival Evolved. Some players are interested in setting up their own servers to play the game, but they may not know where to start. So, let’s take a look at a tutorial on how to set up a multiplayer server for this game.
Currently, the maximum limit for multiplayer in PalWorld’s official servers is 4 players. However, it is possible to achieve the goal of supporting up to 32 players simultaneously online by using a dedicated server.
For players familiar with VPS servers, setting up their own game server on a VPS server is undoubtedly a great choice.
To deploy your own PalWorld server (Dedicated Server), you first need to have a server. The server is the foundation for running PalWorld.
Using a cloud server to set up a PalWorld server allows you and your friends to play the game in a relatively independent, stable, and private space, ensuring a more enjoyable gaming experience.
You can choose Digital Ocean as your game server and refer to the following tutorial to deploy your PalWorld dedicated server in less than 3-5 minutes.

You can gets $200 in credit over 60 days by my above links. Once you spent $25 with us, you’ll get $25.
Choose a server
In this tutorial, we will use Digital Ocean as an example to explain how to make a server selection:
First, log in to the Digital Ocean website: https://cloud.digitalocean.com/login. If you haven’t registered yet, please register first. If you have registered, simply enter your username and password to log in.

After logging in, you will see the following interface:
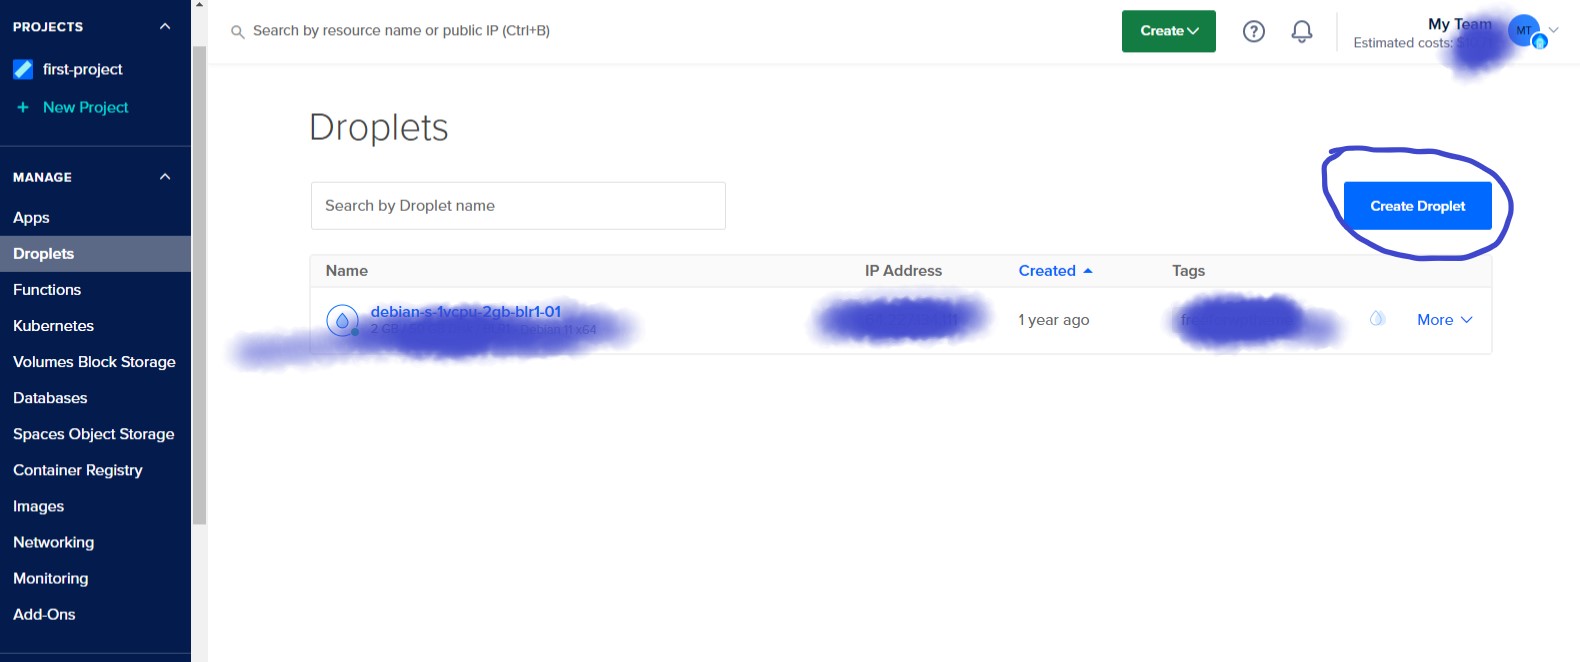
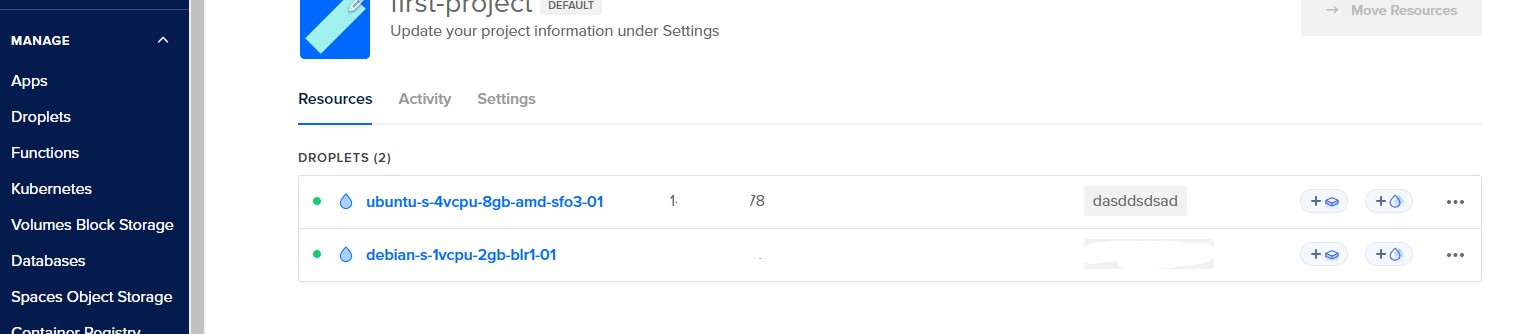
Click on “Manage” on the left side, and then click on “Droplets” to enter the Droplets details. Here, you can see the status of the Droplets you own as below.
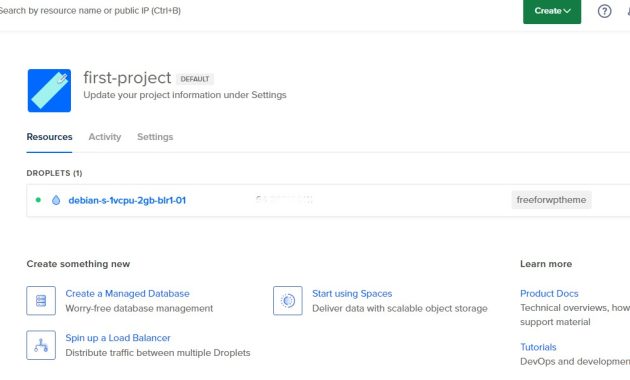
I have already purchased a server, so it shows that I have one server. If you haven’t purchased one, the “Name” field will be empty. At this point, click on “Create Droplet” on the right to enter the server configuration page.
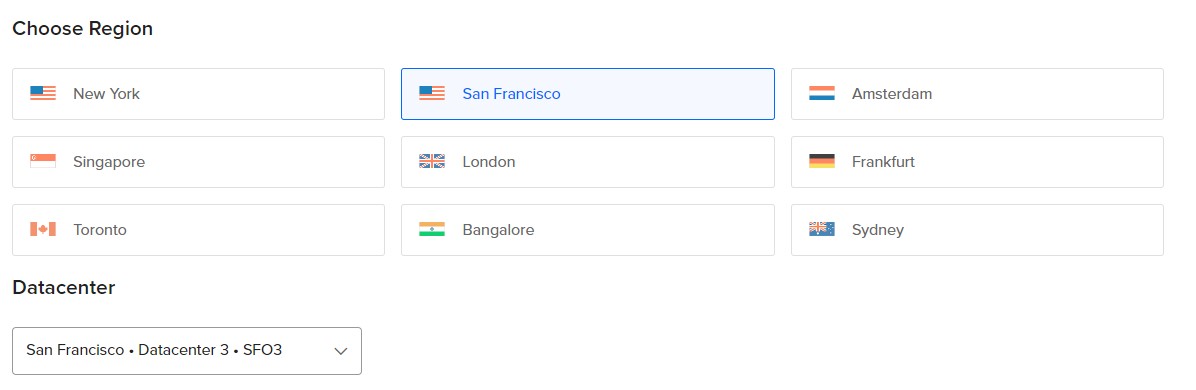
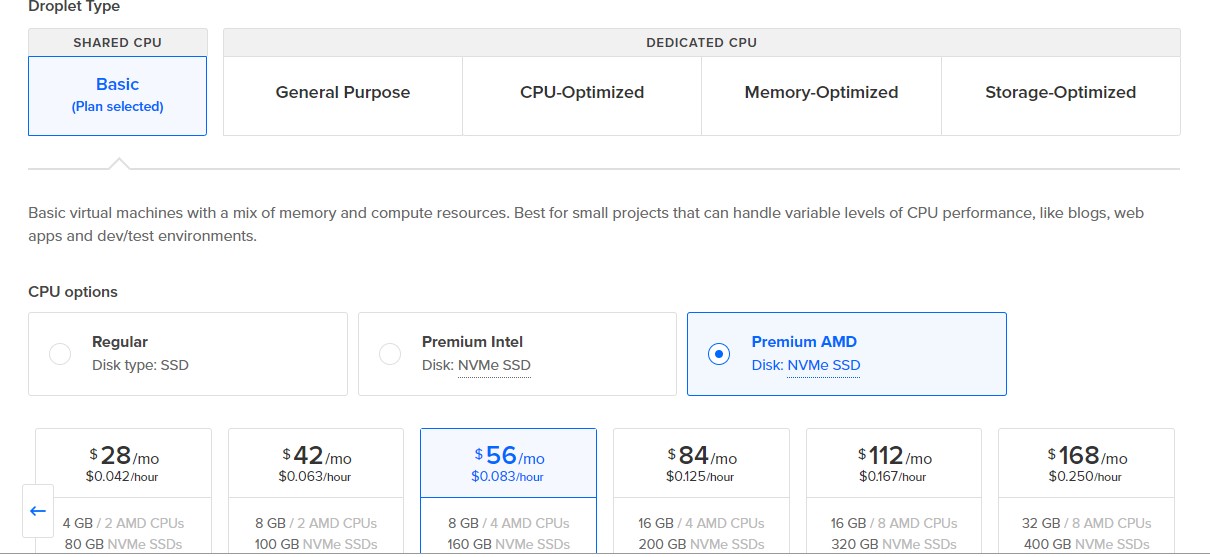
First, choose a region: We recommend selecting a region that is relatively close to you for a better online experience.
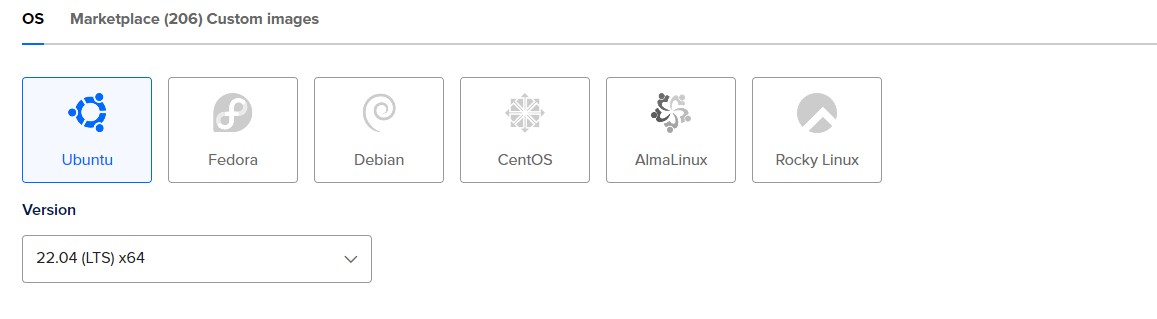
Choose the operating system: Let’s use Ubuntu 22.04 (LTS) x64 as an example.
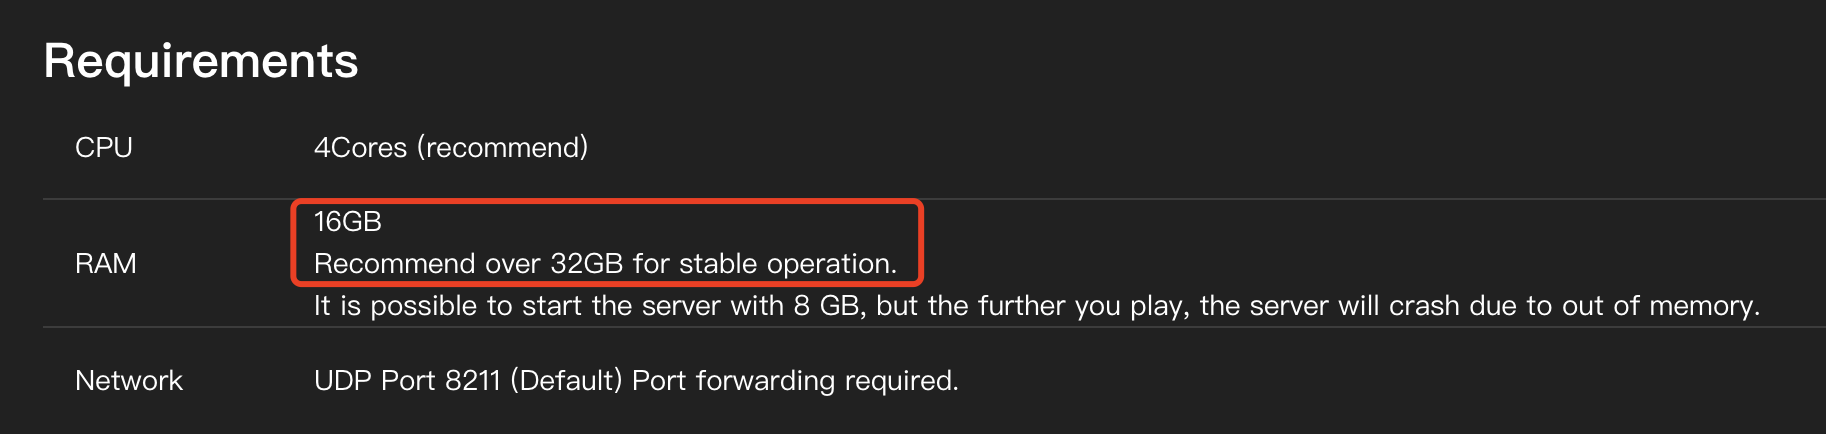
Server size: Based on the recommended configuration from PalWorld, we suggest choosing a package with 4 cores and 16GB of RAM or higher. However, from actual usage experience, a shared 4-core CPU and 8GB of RAM can barely be used. But if there are more people, it is still recommended to start with 16GB, or ideally 32GB.
After selecting the server, “Backups” is server backups, which you can purchase based on your needs. Generally, it is not necessary to purchase.
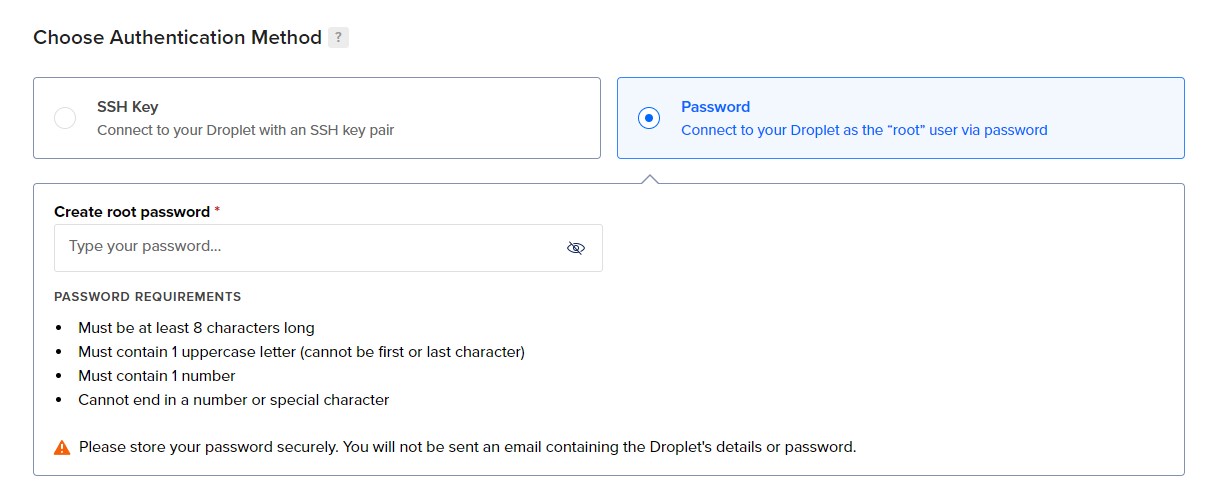
Next, you need to enter the root password for the server (remember this password because we will use it to log in to the server). There are two options: SSH Key or password. I usually use a password.
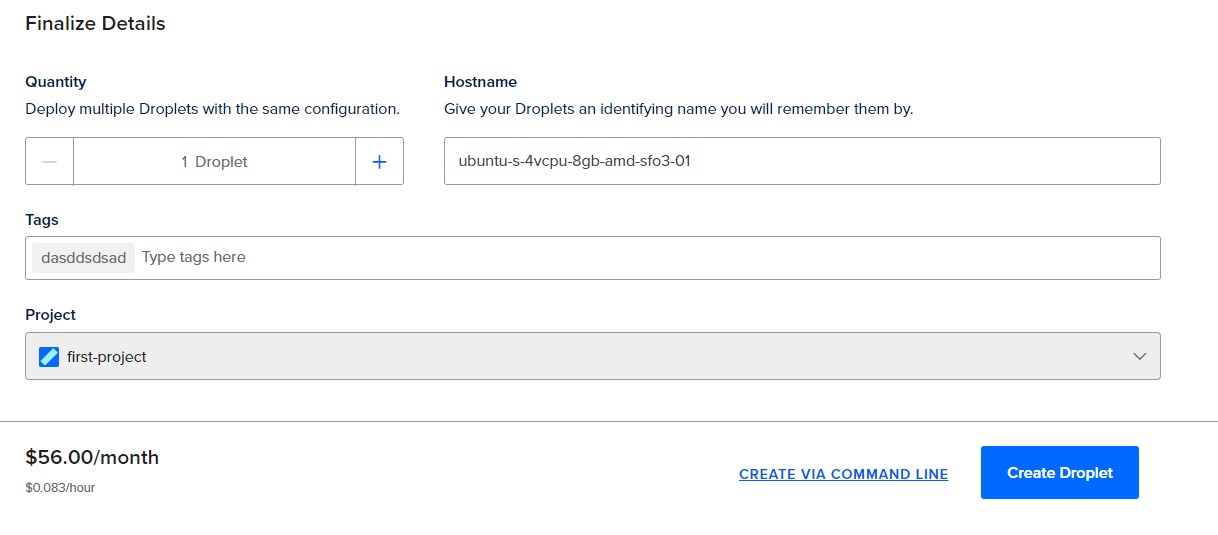
After entering your password, fill in the Hostname and Tag fields as needed. These are not essential. Once everything is confirmed, click on “Create Droplet” to complete the server purchase.
Once completed, you will be taken to the Droplets details page, where you can see that your server has been successfully created.
Firewall configuration
PalWorld uses port 8211 for communication by default. Before logging in, you need to open port 8211 in the instance’s firewall.
Tips:
Ports are like “doors” to your server. Only if you open the doors, your friends can enter.
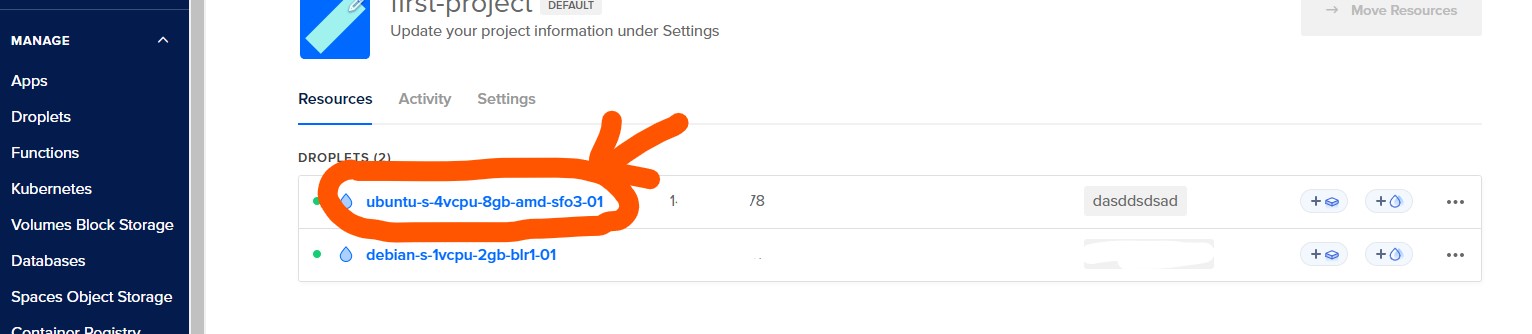
Click on the server under the “Name” column. In the red circle area.
go to the Droplets settings.
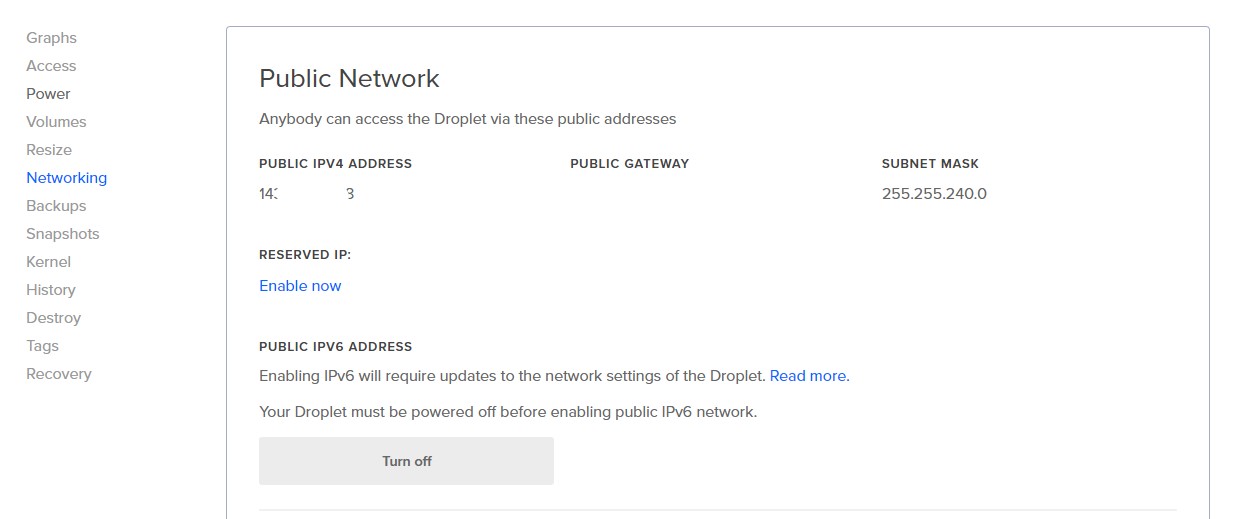
Click on “Networking” on the left side to enter the network settings page. Scroll down to the bottom where it says “Firewalls” and click on “EDIT”.
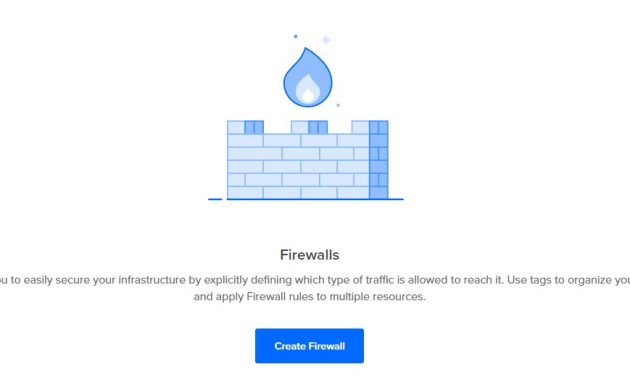
Then click on “Create Firewall” to enter the firewall settings details page. The rules are as follows:
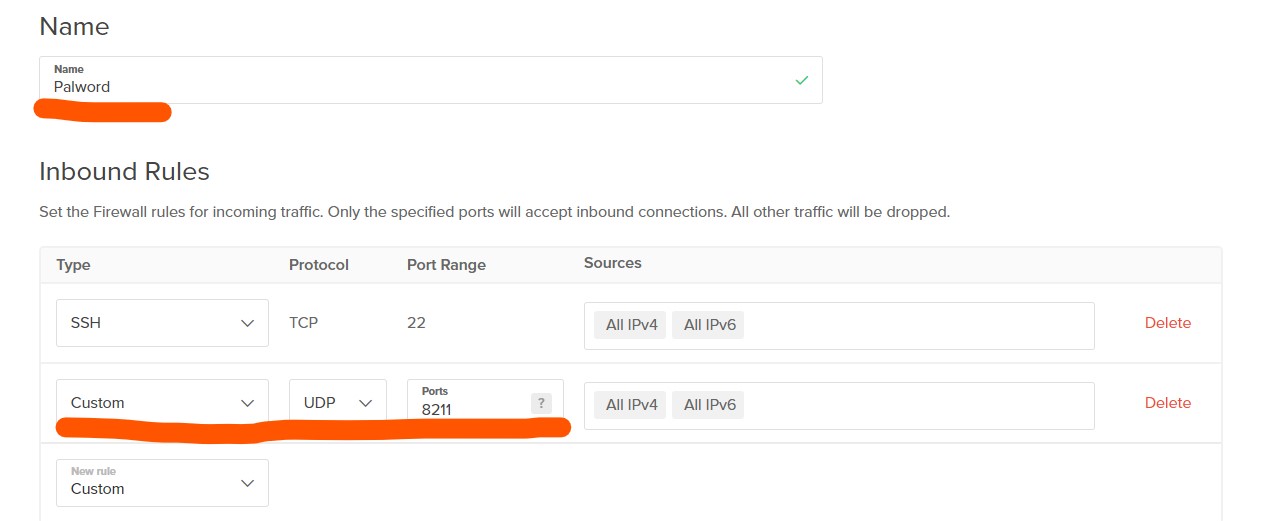
Protocol: UDP
Port: 8211
Policy: Allow
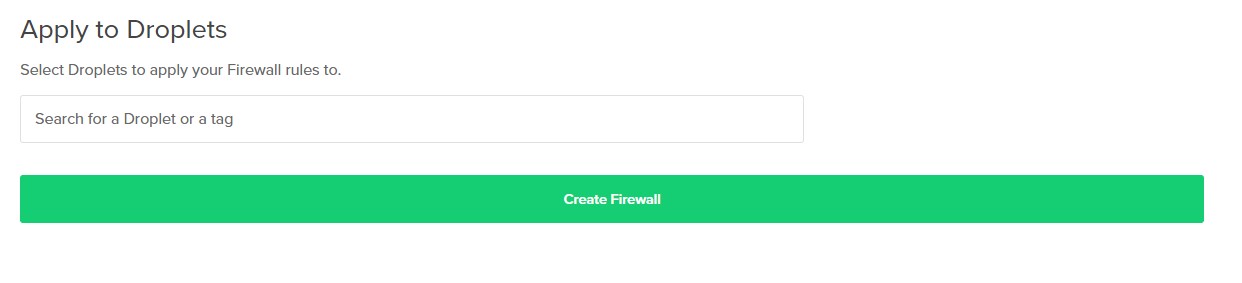
After filling in the information as shown in the diagram, do not modify any other content. In the “Apply to Droplets” section, enter the tag of your server.
It will prompt you to select from the options after entering the first letter. Once you have made your selection, click on “Create Firewall” to complete the PalWorld server firewall configuration.
Next, we move on to the server installation stage.
One-Click Server Installation
Log in to the server terminal. There are two ways to log in:
- one is using an SSH client, where you input the server’s IP address, set the port number to 22, and enter the password you created when setting up the server.
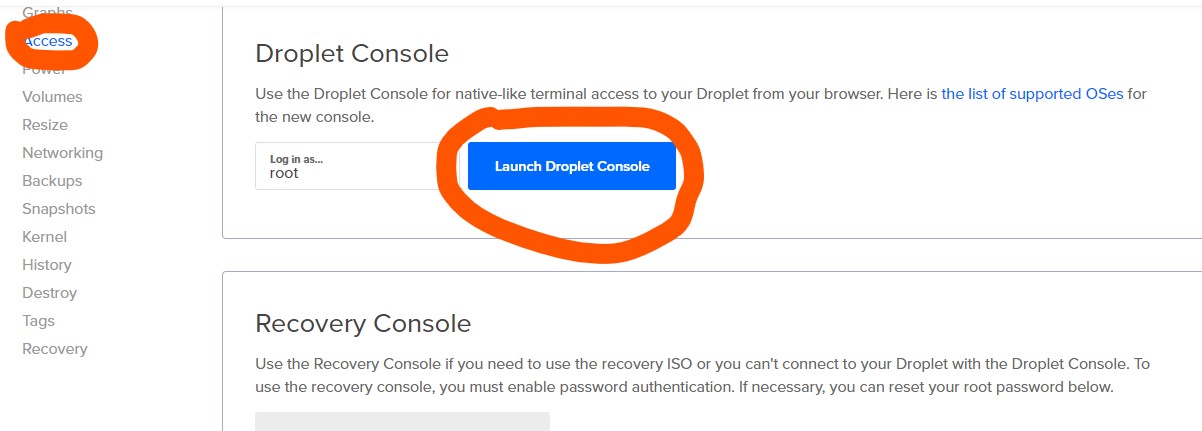
- The other simple method is to log in directly through the web. This method does not require manually entering the root password and allows you to access the terminal directly.
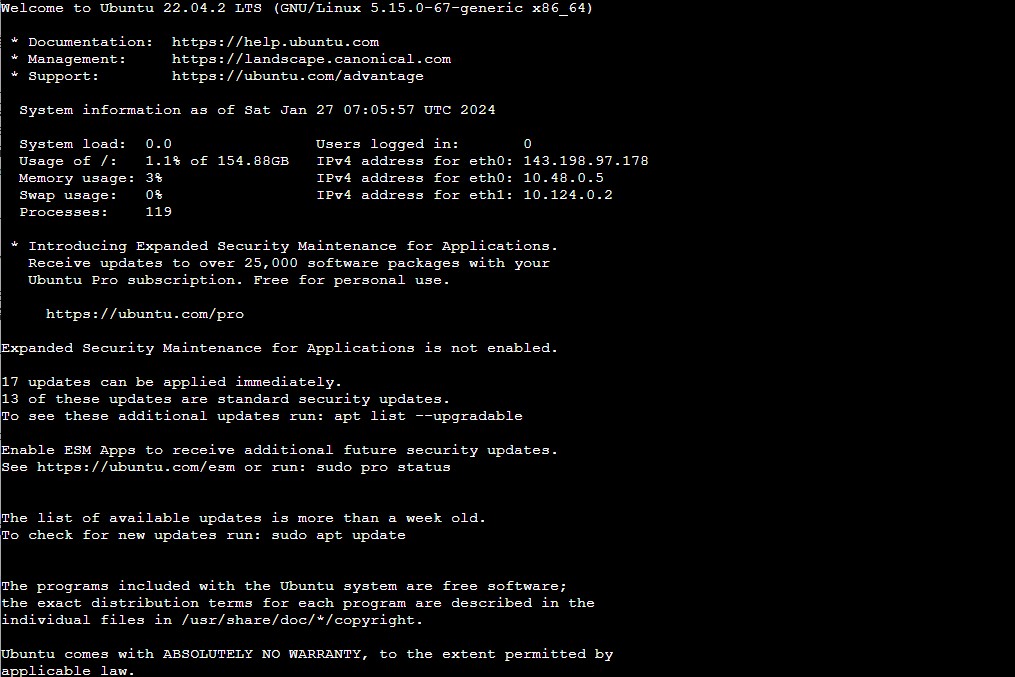
Let’s use the latter method. On the Droplets details page, click on “Access” and then “Launch Droplet Console” to enter the terminal.
Once you see the image as shown below, it means you have successfully entered the terminal.
Now we can proceed with the one-click server deployment.
The one-click deployment method is suitable for developers who want to quickly set up a PalWorld server. It only requires running a single command to complete the deployment.
About Palworld one-click script
In the one-click deployment script, we have also included memory optimization strategies based on Zram, which will further alleviate the memory leak issues in the game. Here is how Zram works:
Zram (also known as compressed swap) is a feature in the Linux kernel that provides in-memory compression and decompression for virtual memory. By storing compressed memory blocks in memory, it can effectively improve the system’s memory utilization and reduce read and write operations on physical disks.
We have prepared a one-click deployment script for PalWorld based on the official tutorial, and uploaded it to the cloud. You only need to log in to the server and run the following command to complete the deployment of PalWorld:
wget -O - https://pal-server-1251810746.cos.accelerate.myqcloud.com/pal-server/Ubuntu/install_and_zram.sh|sh
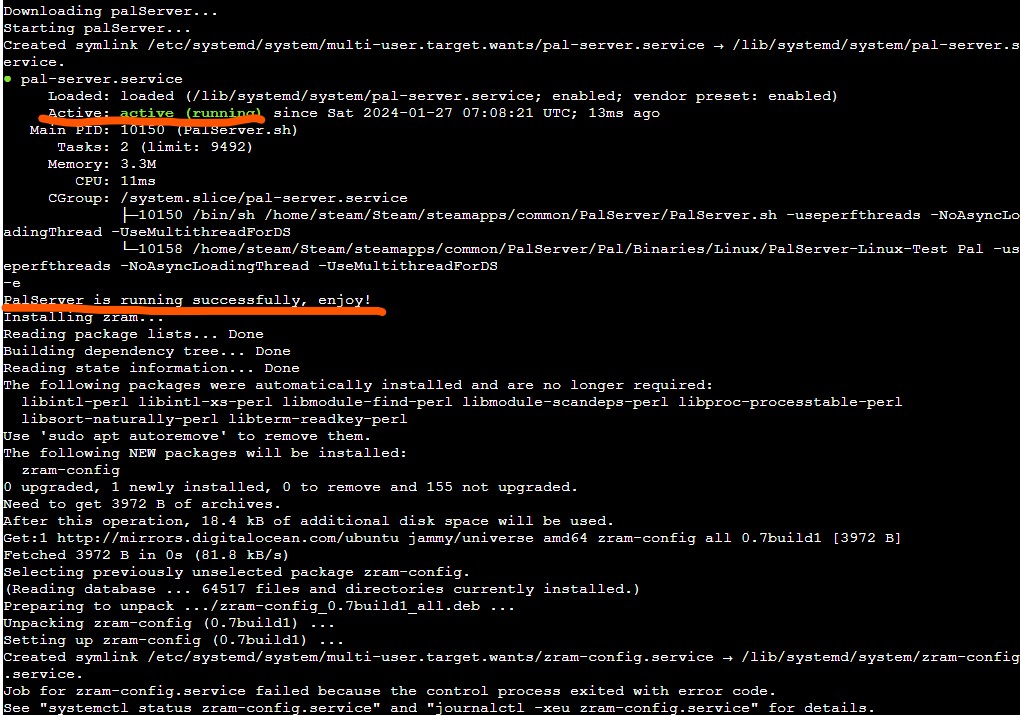
Once the one-click deployment script is executed successfully, a service named “pal-server” will be created on the server.
You can use the following command to check if the service is running properly. If you see the desired output, it means the server has been successfully deployed:
sudo systemctl status pal-server
If you want to manage the service in the future, you can use the following commands:
Start PalWorld service
sudo systemctl start pal-server
Restart PalWorld service
sudo systemctl restart pal-server
Stop PalWorld service
sudo systemctl stop pal-server
Check the status of PalWorld service
sudo systemctl status pal-server
At this point, the PalWorld server-side setup is complete. In addition to the one-click script, there is also a manual method to configure the server, which I will explain later.
Now, let’s move on to the configuration of the PalWorld client.
Logging into the game
Prerequisites
First, you need to download the Steam client on your local machine.
Second, you need to purchase Palworld on Steam.

Login Steps
Step 1: Open the Steam client and log in to your Steam account.

Step 2: In the “Library” section, find Palworld and click on “Start Game.”
Step 3: In the game menu, select “Join Multiplayer Game (Dedicated Server).”
Step 4: At this point, you have successfully set up a dedicated server for Palworld. Players can now input your deployed server’s public IP address + port (8211) to connect to the server and play together.
Advanced Guide: Configuring Game Parameters (Optional)
We recommend using the one-click deployment tutorial for Palworld mentioned in this article. Other deployment methods may have different paths for the configuration files.
Copying Palworld Default Configuration File
1.Use the following command to add permissions to the configuration file to avoid permission issues when editing it.
sudo chmod 777 /home/steam/Steam/steamapps/common/PalServer/Pal/Saved/Config/LinuxServer/PalWorldSettings.ini
2.Use the following command to copy the default configuration file to the LinuxServer directory under Palworld:
By default, the PalWorldSettings.ini file is empty, and manually configuring it can be challenging. Therefore, we recommend making modifications based on the default configuration file.
sudo cp /home/steam/Steam/steamapps/common/PalServer/DefaultPalWorldSettings.ini /home/steam/Steam/steamapps/common/PalServer/Pal/Saved/Config/LinuxServer/PalWorldSettings.ini
3.Use the following command to open the game parameter configuration file, PalWorldSettings.ini.
sudo vim /home/steam/Steam/steamapps/common/PalServer/Pal/Saved/Config/LinuxServer/PalWorldSettings.ini
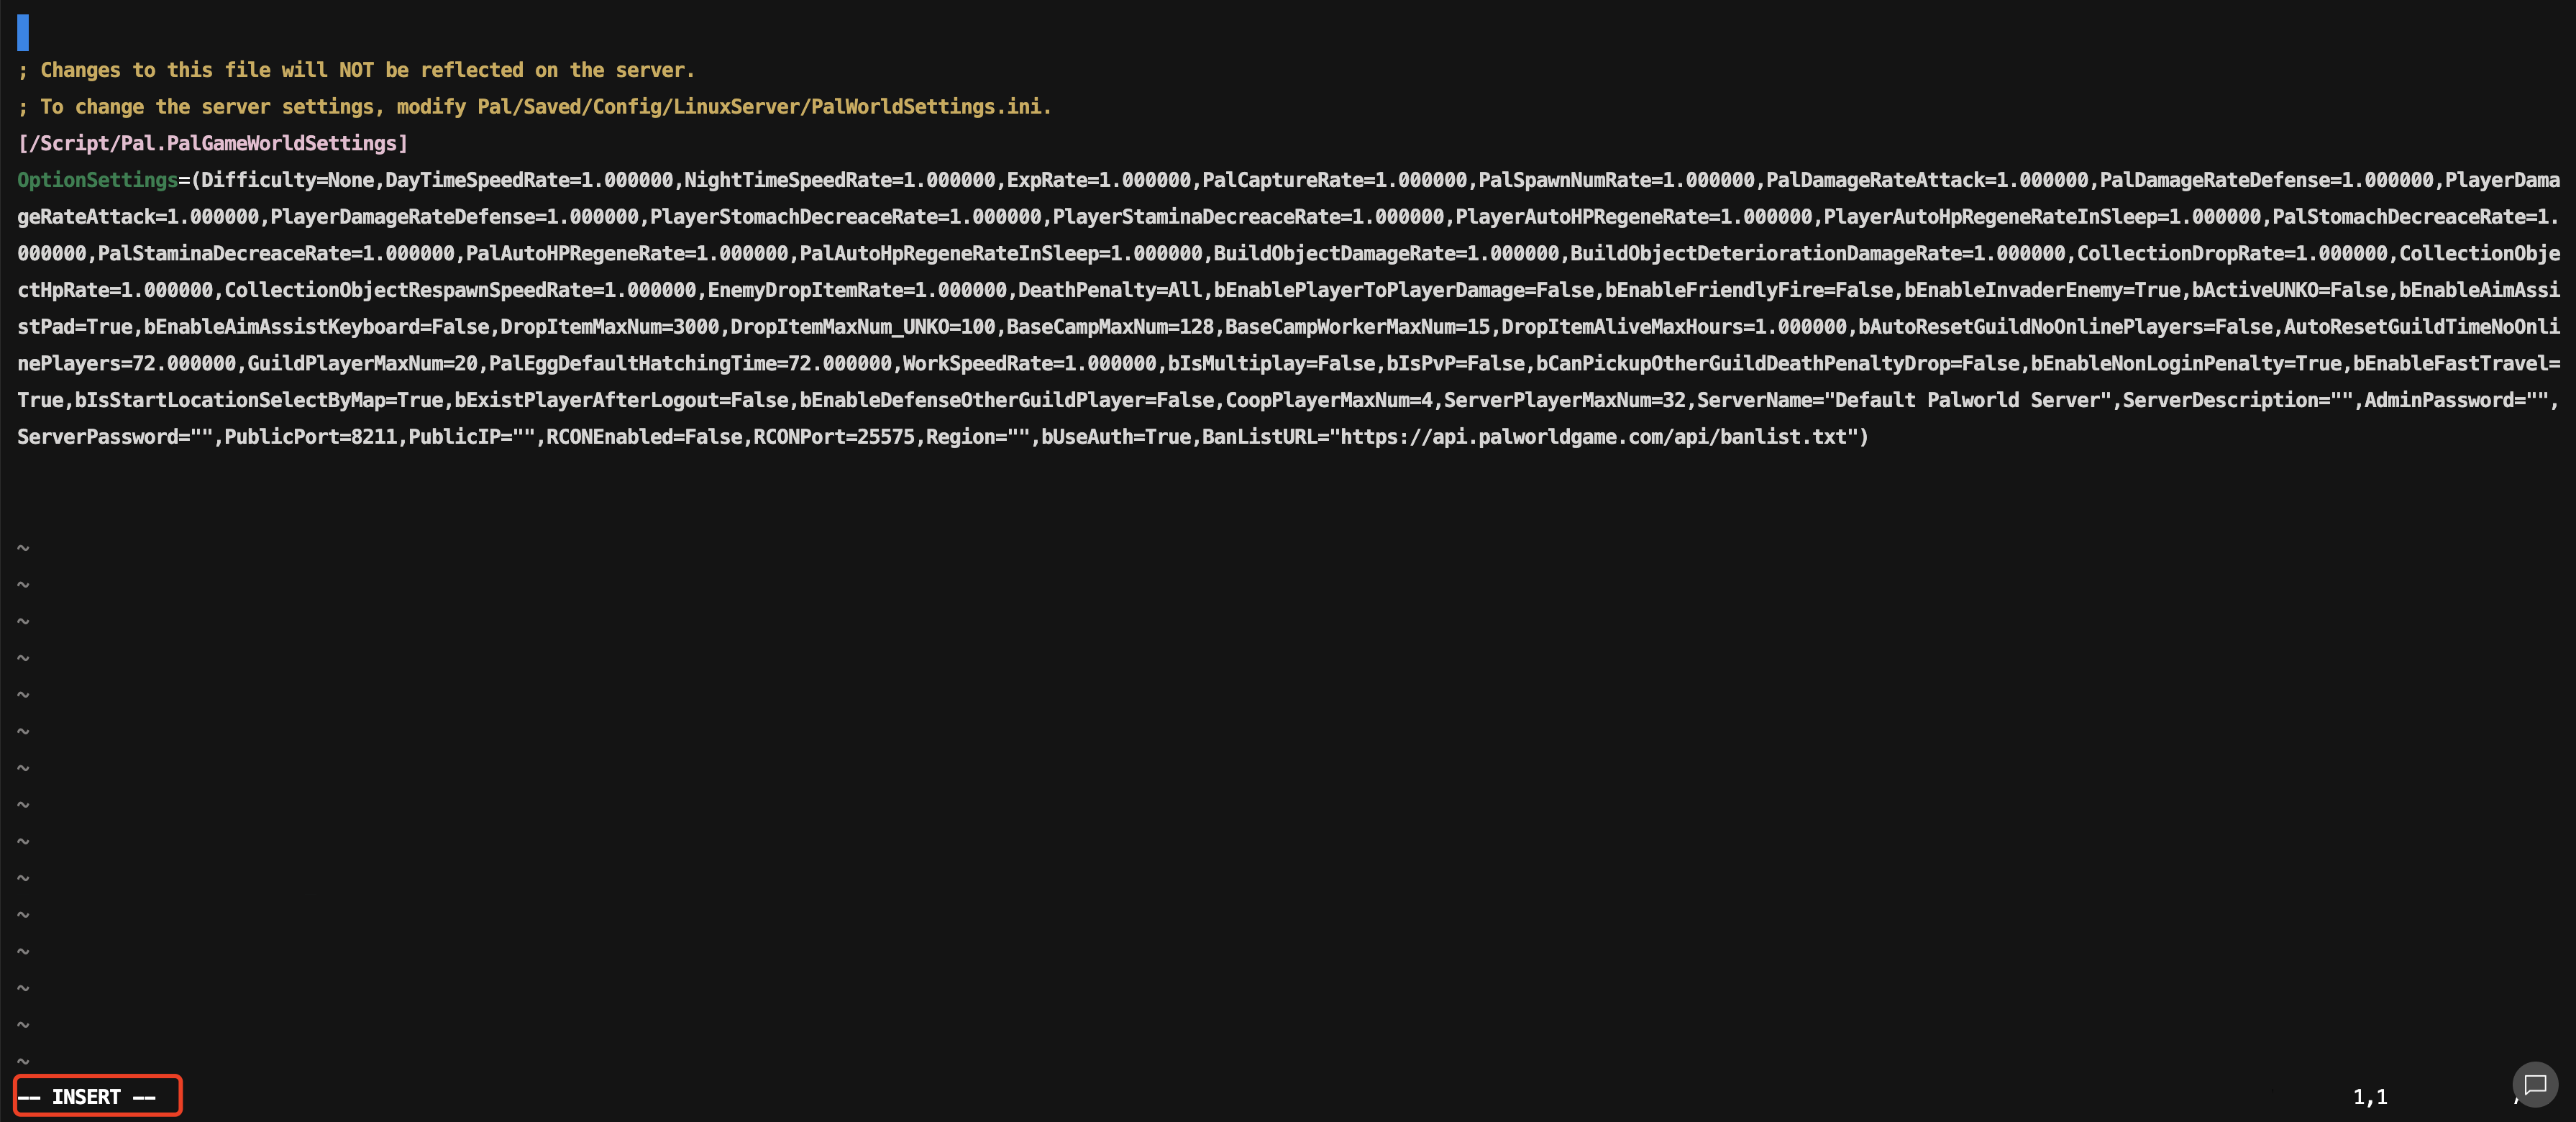
Press ‘i’ to enter edit mode, and move the cursor to the end of the file to start writing the configuration. The edit mode will look like the image below:
4.After finishing the edits, press the ‘Esc‘ key to exit edit mode, and type ‘:wq‘ followed by the Enter key to save the file and exit Vim. The result will be similar to the image shown.

‘Esc’ key: It is generally located in the top left corner of the keyboard. After pressing it, there won’t be a visible prompt. You can directly type ‘:wq’.
Configuring Parameters
Log in to the Linux server as before, using the web login method mentioned earlier. In the Droplets details page, click “Access,” then “Launch Droplet Console” to access the terminal.
Modify the game parameters
1.Use the following command to stop the game service first.
⚠️ Note: If you modify the configuration file without stopping the game process, the changes won’t take effect.
sudo systemctl stop pal-server
2.Use the following command to add permissions to the configuration file to avoid permission issues when editing it.
sudo chmod 777 /home/steam/Steam/steamapps/common/PalServer/Pal/Saved/Config/LinuxServer/PalWorldSettings.ini
3.Use the following command to copy the default configuration file to the LinuxServer directory under Palworld:
By default, the PalWorldSettings.ini file is empty, and manually configuring it can be challenging. Therefore, we recommend making modifications based on the default configuration file.
sudo cp /home/steam/Steam/steamapps/common/PalServer/DefaultPalWorldSettings.ini /home/steam/Steam/steamapps/common/PalServer/Pal/Saved/Config/LinuxServer/PalWorldSettings.ini
4.Use the following command to open the game parameter configuration file, PalWorldSettings.ini.
sudo vim /home/steam/Steam/steamapps/common/PalServer/Pal/Saved/Config/LinuxServer/PalWorldSettings.ini
Press ‘i‘ to enter edit mode, and move the cursor to the end of the file to start writing the configuration. The edit mode will look like the image below:
5.After finishing the edits, press the ‘Esc’ key to exit edit mode, and type ‘:wq’ followed by the Enter key to save the file and exit Vim. The result will be similar to the image shown.
‘Esc’ key: It is generally located in the top left corner of the keyboard. After pressing it, there won’t be a visible prompt. You can directly type ‘:wq’.
Palworld Game Configuration Parameters Explanation
Difficulty=None
DayTimeSpeedRate=1.000000
NightTimeSpeedRate=1.000000
ExpRate=1.000000
PalCaptureRate=1.000000
PalSpawnNumRate=1.000000
PalDamageRateAttack=1.000000
PalDamageRateDefense=1.000000
PlayerDamageRateAttack=1.000000
PlayerDamageRateDefense=1.000000
PlayerStomachDecreaceRate=1.000000
PlayerStaminaDecreaceRate=1.000000
PlayerAutoHPRegeneRate=1.000000
PlayerAutoHpRegeneRateInSleep=1.000000
PalStomachDecreaceRate=1.000000
PalStaminaDecreaceRate=1.000000
PalAutoHPRegeneRate=1.000000
PalAutoHpRegeneRateInSleep=1.000000
BuildObjectDamageRate=1.000000
BuildObjectDeteriorationDamageRate=1.000000
CollectionDropRate=1.000000
CollectionObjectHpRate=1.000000
CollectionObjectRespawnSpeedRate=1.000000
EnemyDropItemRate=1.000000
DeathPenalty=All
bEnablePlayerToPlayerDamage=False
bEnableFriendlyFire=False
bEnableInvaderEnemy=True
bActiveUNKO=False
bEnableAimAssistPad=True
bEnableAimAssistKeyboard=False
DropItemMaxNum=3000
DropItemMaxNum_UNKO=100
BaseCampMaxNum=128
BaseCampWorkerMaxNum=15
DropItemAliveMaxHours=1.000000
bAutoResetGuildNoOnlinePlayers=False
AutoResetGuildTimeNoOnlinePlayers=72.000000
GuildPlayerMaxNum=20 (Maximum number of players in a guild)
PalEggDefaultHatchingTime=72.000000 (Default hatching time for pal eggs in hours)
WorkSpeedRate=1.000000 (Work speed multiplier)
bIsMultiplay=False (Multiplayer mode)
bIsPvP=False (PvP mode)
bCanPickupOtherGuildDeathPenaltyDrop=False (Ability to pick up death penalty drops from other guilds)
bEnableNonLoginPenalty=True (Enable non-login penalty)
bEnableFastTravel=True (Enable fast travel)
bIsStartLocationSelectByMap=True (Start location selection based on map)
bExistPlayerAfterLogout=False (Player existence after logout)
bEnableDefenseOtherGuildPlayer=False (Enable defense against players from other guilds)
CoopPlayerMaxNum=4 (Maximum number of cooperative players)
ServerPlayerMaxNum=32 (Maximum number of players in the server)
ServerName="" (Server name)
ServerDescription="" (Server description)
AdminPassword="" (Admin password)
ServerPassword="" (Server password)
PublicPort=8211 (Public port number)
PublicIP="" (Public IP address)
RCONEnabled=False (Enable RCON)
RCONPort=25575 (RCON port number)
Region="" (Region)
bUseAuth=True (Use authentication)
BanListURL="https://api.palworldgame.com/api/banlist.txt" (Ban list URL)
Restart the game process
After modifying and saving the configuration file, you need to restart the game process or service to apply the game configuration changes.
1.Use the following command to restart the service and apply the changes:
sudo systemctl restart pal-server
2.Use the following command to check if the service is running properly. If you see the status as shown in the image, it means the service has started successfully.
sudo systemctl status pal-server
Advanced Guide: Memory Optimization (Optional)
We have received feedback from many players that after running the server for some time, they encounter insufficient memory issues. Here are some solutions to alleviate memory issues:
- Configure Zram for Linux Servers.
- Configuring Swap for Linux Servers
- Set up automatic service restart.
Configuring Zram for Linux Servers
About Zram
Zram, also known as compressed swap space, is a feature in the Linux kernel that provides compression and decompression functionality for virtual memory. By compressing memory blocks stored in RAM, it can effectively improve memory utilization and reduce read/write operations on the physical disk.
After configuring Zram, the server can accommodate more players or run for a longer time without increasing the physical memory configuration. We provide a one-click solution to configure Zram for Linux servers. Simply copy and run the following command after logging into the Linux server:
sudo wget -O - https://pal-server-1251810746.cos.accelerate.myqcloud.com/pal-server/Ubuntu/zram.sh | sh
The successful configuration will have the effect shown in the image.
Configuring Swap for Linux Servers
Swap
Swap is a virtual memory technique used in computer systems, allowing the operating system to temporarily store data from memory to the hard disk to provide space for other tasks that require more memory.
Step 1: Check the current swap status. If you are configuring it for the first time, running this command will not return anything.
swapon --show
Step 2: Create a swap file
In the command, “8G” specifies creating a file with a size of 8GB, which will be used as swap space to temporarily store data that doesn’t fit in memory. You can adjust the size as needed.
For Linux, it is recommended to set the file size to match the system memory. Here, we use 8GB as an example for a system with 8GB of memory.
sudo fallocate -l 8G /swapfile
Step 3: Set file permissions
sudo chmod 600 /swapfile
Step 4: Format the file as swap

sudo mkswap /swapfile
Step 5: Enable the swap file
sudo swapon /swapfile
Step 6: Make the swap file permanent (automatically enable the swap file on system startup)
sudo vim /etc/fstab
Use the arrow keys or the j, k, h, l keys to navigate to the end of the file. Press i to enter edit mode, and the cursor will move to the end of the file. Add the following content to the file:
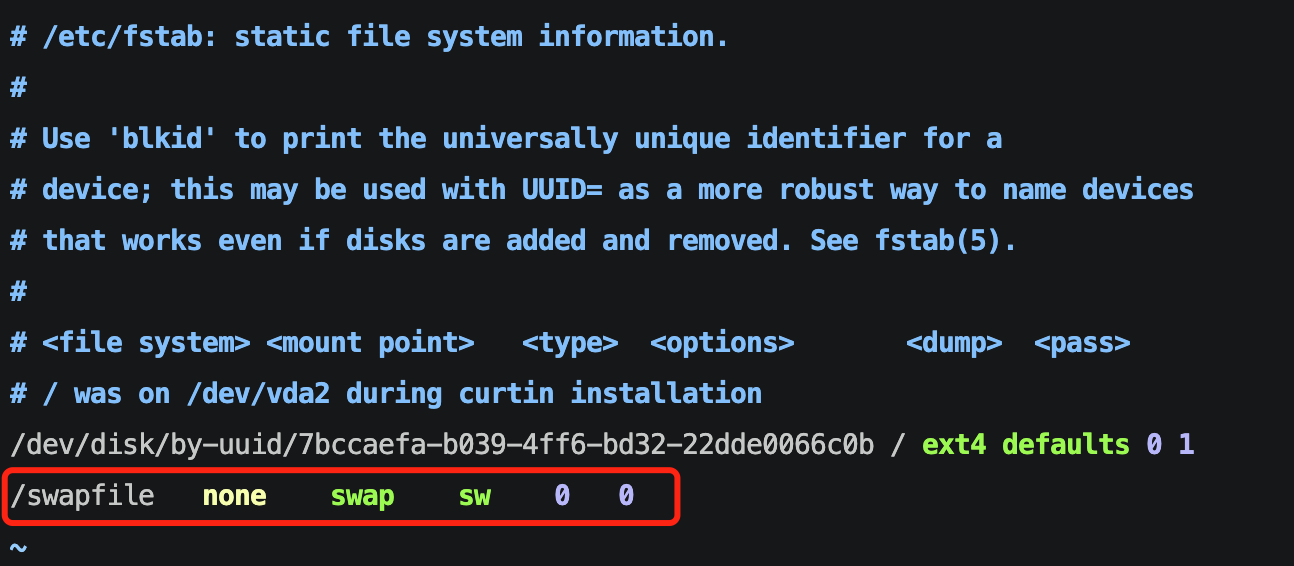
/swapfile none swap sw 0 0
Press Esc to exit edit mode, then type :wq and press Enter to save the file and exit vim.
Step 7: Reload the fstab file
sudo swapon --all
Step 8: Verify if the swap settings are successful
swapon --show
If you see the content as shown in the image, it means the settings are successful.

Of course, after all that, the best practice may still be to upgrade your server package configuration.
Configuring Automatic Restart for PalWorld Server
Due to memory leaks in the game program itself, you can also clean up memory by restarting the game within the server after playing for a certain period of time.
This section provides a script to configure automatic restart of the game based on memory usage percentage. After configuring it, when the server’s memory usage exceeds 90%, the game will be automatically restarted to free up memory.
⚠️ Note:
1.You need to deploy PalWorld using the one-click deployment method mentioned earlier to use the following automatic restart tutorial.
2.When you log back into the game, there will be a rollback of approximately 10 seconds.
1.Log in to the server, referring to the previous section on logging into a Linux server for detailed steps.
2.Run the following command to monitor memory usage and automatically restart when the usage exceeds 90%:
wget -O - https://pal-server-1251810746.cos.accelerate.myqcloud.com/pal-server/Ubuntu/auto_restart_on_high_memory.sh | sh
Latest Scripts of Palworld Server
1.Palworld Host Save Fix Script
This tool is experimental. Before using this script, be cautious of data loss and make sure to do proper backups.
Palworld save files (identified by GUID) may vary depending on the type of server you are running. There are different types of Palworld servers, such as Windows dedicated server, Linux dedicated server, and SteamCMD dedicated server. For example, if you try to migrate files created on a Windows server to another Windows server, you may encounter save errors, which will require you to create a new character.
This error occurs because the server associates the generated character save files with a GUID assigned to the player. The player GUIDs generated by these different types of servers are different.
Therefore, when a player joins, the server generates a new GUID that doesn’t match the old one, instead of directly matching the old GUID.
To fix this error, the purpose of this script is to obtain the GUID of the players on the new server and apply it to the player saves on the old server so that the new server will use the player saves from the old server.
This is a Python script. If you don’t know how to run a Python script on your VPS server, you can refer to one of my previous articles-How to Run Python Scripts on a VPS Server Long-Term
Visit the Palworld Host Save Fix Script
2.Palworld Server Auto restart Script
When the memory is insufficient, Automatically restart the Palworld game service and send notifications to iPhone and WeCom robots.
Save the .sh code below as start.sh. modify the {wecomkey} with your own.
and Run the start.sh as service.
Vist the Palworld Server Auto restart Script
The places you need to modify.
{wecomkey} : Your own WeCom key. {barkkey}: The Key of a Mobile Push Notification App: Bark
#!/bin/bash

# The complete path of PalServer.sh
PAL_SERVER_SCRIPT_PATH="/home/steam/Steam/steamapps/common/PalServer/PalServer.sh"

# The URL to send the request.
WECOM_URL="https://qyapi.weixin.qq.com/cgi-bin/webhook/send?key={wecomkey}"
IPHONE_URL="https://api.day.app/{barkkey}/PalWorld/"

# Available memory limit (unit: MB), here is 300MB.
MEM_LIMIT=300


# The function to start the PalServer.sh script.
start_pal_server() {
    # Run PalServer.sh in the background as a steam user.
    sudo -u steam bash "$PAL_SERVER_SCRIPT_PATH" &
    echo "PalServer.sh started"
    send_wechat_message "Start PalServer"
    send_iphone_message "Start%20PalServer"
}

# Function to send messages to WeCom Bot
send_wechat_message() {
    local message=$1
    local json_data=$(cat <<EOF
{
    "msgtype": "text",
    "text": {
        "content": "$message"
    }
}
EOF
)

    curl -s -w "\n" "$WECOM_URL" \
        -H 'Content-Type: application/json' \
        -d "$json_data"
    echo "Message sent to WeChat: $message"
}

# Function to send messages to iPhone
send_iphone_message() {
    local message=$1
    local icon="?icon=https://freeforwptheme.com/wp-content/uploads/2023/10/VPS.jpg"
    local url="${IPHONE_URL}${message}${icon}"

    curl -s -w "\n" -G "$url"
    echo "Message sent to iPhone: $message"
}

# Function to check memory and restart.
check_and_restart() {
    # Get the available memory of the entire system (unit: MB)
    AVAILABLE_MEM=$(free -m | awk '/^Mem:/{print $7}')
    echo "Available Memory - ${AVAILABLE_MEM}MB..."
    # If the available memory is below the limit, restart PalServer.sh.
    if [ "$AVAILABLE_MEM" -lt "$MEM_LIMIT" ]; then
        echo "Memory limit exceeded: Available - ${AVAILABLE_MEM}MB, Limit - ${MEM_LIMIT}MB. Restarting PalServer.sh..."
        sudo pkill -f PalServer-Linux 2>/dev/null
        # Send message.
        send_wechat_message "Memory limit exceeded, kill PalServer-Linux"
        send_iphone_message "Memory%20limit%20exceeded"
        sleep 30
        start_pal_server
    fi
}


# First start PalServer.sh
start_pal_server
echo "PalServer started"

# Set up an infinite loop.
while true; do
    # Check the memory every minute.
    check_and_restart
    sleep 60
    echo "time interval running..."
    # Restart PalServer.sh every four hours.
    # if ((SECONDS >= 14400)); then
    #     echo "Four hours passed. Restarting PalServer.sh..."
    #     sudo pkill -f PalServer-Linux 2>/dev/null
    #     # Send message
    #     send_wechat_message "Four hours passed, restarting PalServer"
    #     send_iphone_message "Four%20hours%20passed%20restarting%20PalServer"
    #     sleep 30
    #     start_pal_server
    #     # Reset Stopwatch
    #     SECONDS=0
    # fi
done